Etude 1
Anaglyph Images
Statement Of Intentions
My initial thoughts on this project were just about producing an anaglyph by researching the area and finding out how they were produced. When I got into the project and I found out how relatively easy they were produce using Photoshop, the brief changed slightly to accommodate a wider concept. The concept that I settled on was to produce one or more pieces of anaglyph art that when viewed in 2D were as good as when viewed in 3D, the reason behind this thinking was, that if I was a commercial artist then I would want my art to be sold and hung on walls. I felt that if you had to wear the glasses to truly appreciate the piece of art then it was unlikely that this art would make a private collection.
Conceptualisation Of The Work
The purpose of the Etude is as my statement of intentions in that I was looking to explore the area of anaglyphs artistically. I was trying to produce work in an organic way in order to follow the natural flow and progression of ideas. Ultimately I was hoping to produce a piece or pieces of art that work well in 2D and in 3D with the glasses.
This work is relevant for the 3D hybrids module because the action of taking photographs of 3D objects such as fruit basically immortalises them in 2D thus making a hybrid. Following that initial process, the idea of then using stereo pairs within the art piece you are creating, will make the picture appear, when wearing the glasses, as a kind of 3D image again.
As far as my larger project is concerned I'm not sure at this stage whether this study area will have any relevance, my project ideas are quite organic and therefore I haven't settled on my final idea piece yet.
The target audience that I had in mind for the piece/pieces of art that I was hoping to produce will be the homeowner, probably a couple with their minimalist lifestyle, I guess in a way I was hoping to produce lifestyle art, the type that wouldn't look out of place on the wall of a fashionable city crash pad.
I think that because anaglyph has been done by many that it isn't a new concept, and whilst I set out ultimately to do something for myself in terms of artistic learning and development the subject matter that the work is based on may not appeal on a wider plain. I think if this subject was analysed by an art critic the response would probably be a little blasé, although having said that I think that for the audience the interest might last a little longer, if the pieces/pieces brighter up the walls then it has achieved what was set out to do.
Documentation of Technical and Artistic Process
See blog entries below
Technical Analysis
See blog entries below
References
http://graphicssoft.about.com/cs/photoshop/ht/3danaglyph.htm
http://en.wikipedia.org/wiki/Anaglyph_image
http://en.wikipedia.org/wiki/Stereoscopy
http://dogfeathers.com/java/hyperstar.html
http://www.colorstereo.com/anaglyph.gal/ana_dir.html
http://www.flickr.com/photos/tags/anaglyph/
http://www.rleggat.com/photohistory/history/du_hauro.htm
http://www.jonathanfesmire.com/art.html
http://search.deviantart.com/searchcraft/?section=browse&qh=boost%3Apopular+age_sigma%3A24h+age_scale%3A5&q=anaglyph&offset=24
http://www.ray3dzone.com/plychm5.html
http://www.jfedor.org/red-blue-quake2/red-blue-glasses.jpg
How Successful Is The Etude?
I think the study has gone reasonably well. Whilst I'm not technically minded in terms of setting up equipment etc. I think that the advances that I have made towards making some reasonable anaglyphs has been fairly good. I have to say that my picture taking method with the camera is a bit hap-hazard and given more investment in equipment and an additional camera I may well have cobbled together a piece of equipment that you could place/secure the two cameras on with the facility to adjust the angle of convergence. I'm not sure that the moving footage anaglyph's worked all that well but I think it is more a case of the subject matter being poor, with the solitary person on a plain background. I think on reflection more texture perhaps should have been used.
I'm sure there are technical packages that you can download to assist it the process of creating motion anaglyph's within a software such as Maya although I didn't really research plugin's for Maya purely because I wanted to work through the process myself using After Effects, I think this gave me more of an understanding. I did, however find, that during my explorations that I preferred the still images. You get good results from the still images reasonably quickly, which makes the process worthwhile.
I think I successfully achieved the intentions that I set out to conquer and I think that whilst on the motion anaglyph's I went round the house in terms of filtering I think the experience was invaluable. The apple pictures that I created were interesting and therefore I felt that this was a good theme to stick to when creating further pictures. I think the pictures would appeal in 2D without the glasses as they would in 3D with the glasses.
Thursday, March 27, 2008
Tuesday, March 11, 2008
Experimentation
I have been experimenting further with the use of the apple and an additional item, again overlapping images to create impossible art pieces. Again the idea is that they look good 2D or 3D. I think this piece works well., the apple seems to be a good solid form and with the transparency adjusted creates and interesting container for the guitar.

I would like to do a sequence of apple pictures with various objects contain within it, I think it would make a nice collection.

I would like to do a sequence of apple pictures with various objects contain within it, I think it would make a nice collection.
A bit of history
I though it was important to give you and small background history of who invented the anaglyph.
The anaglyph method of stereoscopic photography was invented /patented by Louis Ducas Du Hauron in 1891. He was the first person to produce a print of an anaglyph image in red and blue colours.
Louis was a french scientist who published a book in 1869 called 'Les Couleurs En Photographie' which made some major theoretical proposals to aid the advancement of using colour in photographs.
The idea of the anaglyph's whilst specifically linked and patented by Louis Ducas Du Hauron, was made by W. Rollman in 1853. He theoretically illustrated the idea in a line drawing using red and blue lines on a black field, he used red and blue glasses to demonstrate the effect.
Information taken from http://www.rleggat.com/photohistory/history/du_hauro.htm
Anaglyph Artists
I've been searching the internet for interesting anaglyph artists to see what kind of content is out there. Here are a few links to good anaglyph art work.
Jonathan Fesmire
Deviant Art
Arthur Girling and L.P. Futo
After looking at some of the art work by other people I realise that perhaps I should be a bit more technical in the taking of my photographs. At the moment I'm guessing the distance and convergence of the two photos, I think it would possible make better results if I worked on measuring the distance with more accuracy.
I quite enjoyed my last picture of the apple inside the apple and I think I might do some kind of composite piece again in anaglyph format. Perhaps I could create a realistic 3D piece with a person or guitar trapped inside the apple and see how that works. This idea is appropriate as I'm hoping that my second etude idea will cover forced perspective photographs.
Overlapping Experimentation part 2
I have desaturated the picture I took in Photoshop, I also decided that four angles (eight photos) of photography is too much. It causes too much of a wash of colour. I have taken the 4 de-saturated images and played with the size and positioning to produce an art piece. I took out a lot of the scene and focused on one major item, the apple.
Here are the results.

I think it works very well, it give the illusion in 3D of one apple being inside the other and in 2D it is a very interesting work in it's own right. Again it may well work better in 2D with Photoshop filters on. I did sharpen the edges in Photoshop to make the fruit stand out more.
Overlapping experimentation
Well I've done a still life with a few objects to experiment with mixing the anaglyph idea with overlapping several images. The method I used was to take two photos from the front, the side, the rear and the other side. Make each set of two photos into a fully merged anaglyph and then overlap each anaglyph one by one, using the multiply colour blend function in Photoshop and then merging each picture down on to the other until all four anaglyph are incorporated.
I set out to produce a piece of art work that will function as a 2D piece and a 3D whilst wearing coloured specs. Here are the results of my work. I think critically this piece works better in 2D with Photoshop filters on than it does with the 3D specs on. I think the difficulty is that if you get the subject correct then the specs makes the outcome of the work very effective, but if you don't it all looks like a bit of a blur, the specs also make you go a little crossed eyes if you wear them for too long. I'm losing the ability to see straight.
Here are the results of my experimentation:-

This is with a dry brush filter

This is with a glass filter

I think maybe I've got the similar problem to before in that the scene is too busy, the most effective of my pieces so far is the chilli peppers picture. The only other relevant point is that I haven't de-saturated the pictures that I have done, I think I will try this with the photos I have already taken and see if there is any improvement to the overall look of the piece.
Friday, March 7, 2008
Alternative test footage
Here are a few other tests of moving footage that I have done.
I'm not sure they work too well, I'm finding it quite difficult to get the cameras in the correct place.
As I mentioned earlier in this study I would like to do a still picture with either a lot of blue or red on to see what happens. I thought I'd do a picture with some red objects to see what the outcome is, I think the result is quite interesting. If you add some standard Photoshop filters to the picture it makes some interesting results. I think the piece below works quite well as a 2D and 3d piece. I would still like to experiment with the overlapping several anaglyphs to see what happens.


I think it is important to look for some anaglyph artists to compare their art works to mine to see if I can get any insight into the type of subject matter that they might use. Maybe this will give me some helpful pointers.
Thursday, March 6, 2008
Etude 1 - Experimentation
I have decided to experiment with producing art in an anaglyph style. I worked on another picture using one of my 3D models from Maya, whilst I haven't finished rigging the character I wanted to see whether the 3d character would jump out of the screen more if modified to suit the dual colour specs. 
The next idea that comes to mind is that I can animate in Maya and pull the footage into After Effects which is a composition software, theoretically if I can adjust the footage colour as I have with the stills in Photoshop I should be able to produce a moving film which appears 3D when the specs are worn. I had a few problems producing the correct colour footage in After Effects, whilst having similar settings to Photoshop, because it is live footage there doesn't appear to be a merge down facility for squashing the cyan and the footage together into one layer. Unless this is merged into one piece switching the blend colour selection to multiply mode instead of screen doesn't work. I though it might be possible to get round the problem by starting a new composition and importing just the cyan layer in as one already composited piece, rather than two separate layers. It worked the only problem with it is that now that it's one piece the state of the footage is starting off with the colour selection as normal instead of screen as it was set in the previous composition. I tried to change the blend mode to multiply but that doesn't appear to be working, again I think the best way will be to merge the red layer as well and make a one piece and import that in too. I did this and changed the setting of the layer to multiply, it appears to be working although I think that because I used footage I already had and just offset it, I need to use two cameras and separate render footage with a slight convergence to get better results. I'm going to try again but this time set up the cameras properly, I am also going to use one of my moving characters and keep the scene more simple. I don't know whether I can get round any of these problems by using the Alpha channels, I don't know much about alpha channels but I know that I can use this facility to turn off the separate colour channels, maybe this will be helpful for the next experiment. My first footage attempt is below, I think the objects that I have chosen don't work too well.

The next idea that comes to mind is that I can animate in Maya and pull the footage into After Effects which is a composition software, theoretically if I can adjust the footage colour as I have with the stills in Photoshop I should be able to produce a moving film which appears 3D when the specs are worn. I had a few problems producing the correct colour footage in After Effects, whilst having similar settings to Photoshop, because it is live footage there doesn't appear to be a merge down facility for squashing the cyan and the footage together into one layer. Unless this is merged into one piece switching the blend colour selection to multiply mode instead of screen doesn't work. I though it might be possible to get round the problem by starting a new composition and importing just the cyan layer in as one already composited piece, rather than two separate layers. It worked the only problem with it is that now that it's one piece the state of the footage is starting off with the colour selection as normal instead of screen as it was set in the previous composition. I tried to change the blend mode to multiply but that doesn't appear to be working, again I think the best way will be to merge the red layer as well and make a one piece and import that in too. I did this and changed the setting of the layer to multiply, it appears to be working although I think that because I used footage I already had and just offset it, I need to use two cameras and separate render footage with a slight convergence to get better results. I'm going to try again but this time set up the cameras properly, I am also going to use one of my moving characters and keep the scene more simple. I don't know whether I can get round any of these problems by using the Alpha channels, I don't know much about alpha channels but I know that I can use this facility to turn off the separate colour channels, maybe this will be helpful for the next experiment. My first footage attempt is below, I think the objects that I have chosen don't work too well.
Wednesday, February 20, 2008
Etude 1 - Technical Research
Right, how does an Anaglyph work?
When you put on the coloured glasses to view the anaglyph the red lens is usually over the left eye and the cyan over the right. The red lens in the glasses make the red areas in the image appear as white and the blue areas as black. In the case of the cyan lens the opposite occurs, it views the blue areas as white and the red areas as black. Then because of the displacement in the images the the lenses makes each eye see a slightly different image the brain then calculates and puts the images together causing the picture to appear 3D.
Technically the only problem with the pictures is that due to the difference in frequencies of the two colours entering the eye, if you just have a standard set of the cardboard red and blue lens glasses, the cyan image appears to be strong and clearer than the red. The red image can sometimes appear to be quite blurry in comparison. More recent glasses have had an slight colour adjustment done on the blue lenses to allow a certain percentage of red colour frequency through in order to combat this problem.
Why Red and Cyan lens?
The reason for the usage of Red and Cyan for the lens and the images is because they are at opposite ends of the colour spectrum scale therefore the colour frequency wavelengths cancel each other out cleanly. If you were to put a different colour lens in such as yellow instead of red there would be a degree of colour from the Cyan image that would get through, so the areas that were Cyan would not appear as black as they would with the Red lens. I would be interested to try this out in order to see whether it makes a more interesting outcome.
So what happens when the image you want to view has a large red or blue content? My assumption is that the area looks as though it is invisible, whilst I'm sure this isn't the idea for conventional work I think that it may make the imagery quite interesting and experimental, I will produce a picture and see how it goes!
Tuesday, February 19, 2008
Etude 1 - Research 3D anaglyphs
Initially I'm going to explore just trying to get an anaglyph produced and I will concentrate on the other issue of producing an art piece that is viable in 2D and 3D in due course.
I've found a tutorial about producing anaglyphs using photoshop at
http://graphicssoft.about.com/cs/photoshop/ht/3danaglyph.htm
I'm so excited by the idea of producing a 3D picture I'm going to get stuck in and experiment, I will fill in the technical background of what causes the image to appear 3D in due course. In the meantime I also need to buy or make a pair of glasses for viewing my work through.
I think making a picture using Photoshop will be my first port of call as it is the easiest method for me at this stage. I have a digital camera which I will use.
Here are the instructions I found.
I will use one camera and mark it's position on a piece of paper. For the left hand photo, as you are looking through the camera, I will stick a small wedge on the front of the camera to the bottom right corner to make allowance for the convergence mentioned above. Then for the right hand picture I will move the camera to the second marked area and change the wedge to the front bottom left of the camera.
Let's see how it goes!
Here are the two original photos prior to processing:-


Below is the anaglyph. In this test run I used slightly too much convergence, therefore, I had to slide the photos within photoshop to correct positions, leaving areas of the photos that didn't overlap, I cropped the piece accordingly.

Here's another test I did I think this one a lot more effective because the sofa is a cleaner, larger focal point. I also adjusted the distance between the overlaid images.

I don't think either of these pieces would work as a solely 2D piece therefore I will carry on experimenting, I may experiment with some moving footage as well which is just for fun.
I think it might be interesting in due course to explore the process of overlapping other anaglyphs within this etude. The overlap idea I've had is to take a pair of photos of from one direction, then moving round the items and take another pair of photos placing the second set over the first set once both have been merged and converted to red and cyan. I though I could process this up to 4 sets of pair images so from front, left, right and rear. I think this may produce something that will be interesting in 2D and 3D. Because it is an experiment I will produce each anaglyph separately and then merge them together in Photoshop a bit at a time. I think the outcome will be interesting. Hopefully this piece may appeal as modern piece of contemporary art for a couple who like a minimalist living environment.
I think I will use still life for this overlap idea as it's a simple. I will get a series of organic items such a fruit and take photos accordingly.
I've found a tutorial about producing anaglyphs using photoshop at
http://graphicssoft.about.com/cs/photoshop/ht/3danaglyph.htm
I'm so excited by the idea of producing a 3D picture I'm going to get stuck in and experiment, I will fill in the technical background of what causes the image to appear 3D in due course. In the meantime I also need to buy or make a pair of glasses for viewing my work through.
I think making a picture using Photoshop will be my first port of call as it is the easiest method for me at this stage. I have a digital camera which I will use.
Here are the instructions I found.
1. Obtain two stereo pair photos. (I often use two disposable cameras mounted on a board side by side and with an ever so slight convergence towards the horizon. Remember you're mimicking your eyes and your eyes always end up focusing on something--each eye can never look straight ahead separately. I find the best anaglyphs work with a very low level of convergence.(This is usually evident by the amount of red/cyan silhouetting around objects in a scene.)
I will use one camera and mark it's position on a piece of paper. For the left hand photo, as you are looking through the camera, I will stick a small wedge on the front of the camera to the bottom right corner to make allowance for the convergence mentioned above. Then for the right hand picture I will move the camera to the second marked area and change the wedge to the front bottom left of the camera.
2. Scan each photo separately. (I would recommend desaturating them to make them B&W.)
3. Open left photo in Photoshop (just like your eye, the left photo is identifiable by the fact that objects within the scene are more to the right when overlayed with the other eye.)
4. From the color selector, select color #00FFFF (bright turquoise). The equivalent of this in RGB is R-000 G-255 B-255.(This is also called cyan).
5. Create a layer above the left photo and fill it with this color.
6. Duplicate this layer and go to Image > Adjust > Invert. This will change the color of this duplicate cyan layer to a red color (direct opposite). In RGB the color created will be R-255 G-000 B-000.
7. Open the right photo and copy it, close it and in the left photo (the one to which you added the colored layers), paste it below the red layer.
Now position the 4 layers as follows: The bottom is your right photo. Above it is the red layer. Above it is the left photo and above this is the cyan layer.
If you wish to check the alignment of the two photo pairs you can turn off red and cyan layers and adjust the opacity of the left photo to 50%. Make sure both photos are on the same vertical plane and shift up/down appropriately. When finished change the opacity of the left photo back to 100%.
Turn on the cyan layer and change the transfer mode to screen.
Merge the cyan and left photo layers together. You should now see a very abstract cyan tinted image that will be hard to distinguish in areas.
Turn off this new cyan layer.
Turn the red and right photo layers back on and change the red transfer mode to screen. (Note: You don't need to merge these two if you don't want to.) Again you'll see an abstract red image similar to the cyan before.
Turn on the new merged cyan/left photo layer and change the transfer mode to multiply. Put on glasses (red on left, cyan on right) and you should now see the anaglyph.
Let's see how it goes!
Here are the two original photos prior to processing:-


Below is the anaglyph. In this test run I used slightly too much convergence, therefore, I had to slide the photos within photoshop to correct positions, leaving areas of the photos that didn't overlap, I cropped the piece accordingly.

Here's another test I did I think this one a lot more effective because the sofa is a cleaner, larger focal point. I also adjusted the distance between the overlaid images.

I don't think either of these pieces would work as a solely 2D piece therefore I will carry on experimenting, I may experiment with some moving footage as well which is just for fun.
I think it might be interesting in due course to explore the process of overlapping other anaglyphs within this etude. The overlap idea I've had is to take a pair of photos of from one direction, then moving round the items and take another pair of photos placing the second set over the first set once both have been merged and converted to red and cyan. I though I could process this up to 4 sets of pair images so from front, left, right and rear. I think this may produce something that will be interesting in 2D and 3D. Because it is an experiment I will produce each anaglyph separately and then merge them together in Photoshop a bit at a time. I think the outcome will be interesting. Hopefully this piece may appeal as modern piece of contemporary art for a couple who like a minimalist living environment.
I think I will use still life for this overlap idea as it's a simple. I will get a series of organic items such a fruit and take photos accordingly.
Etude 1 - Research 3D film/imagery
I've decided as one of my studies I will research how to create 3D film/anaglyph stills.
I was a child growing up in the 70's/80's and we were really fascinated by the seeming simplistic concept of the red and blue/green glasses (anaglyph) that help you see 3D images. My first real clear memory is of the free cardboard glasses that you got on cereal packets along with a 3D picture image to look at. The specific film promotion I'm thinking of was Jaws 3D, whilst I wasn't old enough at the time to see the film the visual idea has obviously lodged itself in my brain. I have never really stopped to think about how this kind of image is produced and I'm hoping it will be straightforward enough for me to research and maybe produce a still image or 10 sec moving image.
The purpose of this etude is for the sake of general artistic exploration, I'm not intenting to produce a masterpiece however it would be nice to produce something artistic. I would like it if I could produce something that could be a piece of viable art in 2D or in 3D with the coloured specs on. The reason for this is that if I was a commercial artist I would like to sell work I do and I think there is some limitation to producing just 3D work that requires the specs to look good.
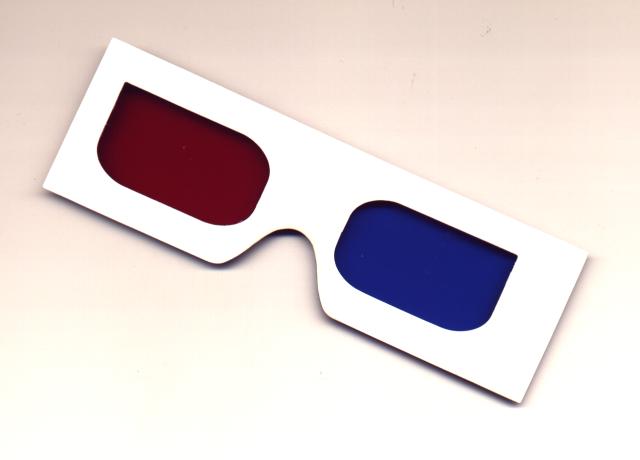
Below is a picture of the great glasses you could get for free on cereal packets:-

http://www.jfedor.org/red-blue-quake2/red-blue-glasses.jpg
So how is it done? How do the coloured glasses produce the illusion of depth?
I was a child growing up in the 70's/80's and we were really fascinated by the seeming simplistic concept of the red and blue/green glasses (anaglyph) that help you see 3D images. My first real clear memory is of the free cardboard glasses that you got on cereal packets along with a 3D picture image to look at. The specific film promotion I'm thinking of was Jaws 3D, whilst I wasn't old enough at the time to see the film the visual idea has obviously lodged itself in my brain. I have never really stopped to think about how this kind of image is produced and I'm hoping it will be straightforward enough for me to research and maybe produce a still image or 10 sec moving image.
The purpose of this etude is for the sake of general artistic exploration, I'm not intenting to produce a masterpiece however it would be nice to produce something artistic. I would like it if I could produce something that could be a piece of viable art in 2D or in 3D with the coloured specs on. The reason for this is that if I was a commercial artist I would like to sell work I do and I think there is some limitation to producing just 3D work that requires the specs to look good.
Below is a picture of the great glasses you could get for free on cereal packets:-

http://www.jfedor.org/red-blue-quake2/red-blue-glasses.jpg
So how is it done? How do the coloured glasses produce the illusion of depth?
3D Hybrids Mini Projects Initial Brainstorming
I've now had my first session of 3D Hybrids and I feel a lot clearer on what needs to be achieved throughout this module. I think the best way for me to proceed is to brainstorm and get a few ideas down for my 4 mini projects to see what I would like to explore further.
My only reservation about this module is how difficult it will be to choose the research topics for the mini modules because you only really know how vast the subject is when you've started researching. I guess we'll only find out in due course!
Here are a couple of early project ideas of interest:-
Holograms
3D film/glasses - anaglyphs
Subscribe to:
Comments (Atom)